Friday, December 24, 2010

Merry Christmas

From my home to yours--wishing you a Merry Christmas!


Wednesday, December 22, 2010

Lucky Me!

The new arts guide Portland came out a couple of weeks ago--this is the guide that Maine Home + Design magazine took over and started creating a series of beautiful Maine-based guide books--and, lucky me, they pulled a cameo from the March 2010 issue "Craft of Maine" by Rebecca Falzano which included me and my jewelry!!!  Thanks so much! 

Monday, December 6, 2010

First Snow

It's December 6th and here in Boothbay, we are getting our first snowfall of the season.  It's pretty and white and the dog is loving it!  Trigger, our fairly new adopted dog, who is also a big goofy, goober, is experiencing his first winter and snow in the Northeast and well--he LOVES it!  Like every good animal mom, I spent alot of time trying to photograph him for our Christmas card, but trying to make him stand still was difficult today and so this is what I got:

"What is this thing around my neck?!  I should chew it."

When promising treats, Trigger obeyed much better.  "Sit, STAY!!!" 

 
"Snow in the face--can't look.  Ooh, I blinked!!"

"I love this white stuff.  It's soooo tasty!  And it's all over the place."


 "Oh, what's that?"  "Trigger.  Trigger.  Treats Trigger.  Look at me."  
  
"What IS it?!  I should get it!"

"Let's go run.  Come get me!"

I think this is the one--pretty cute and shows off his sweet face!  Don't ya think?!


Monday, November 29, 2010

Flowers for Everyone

A full day in the studio=5 pairs of new flower earrings!


With the sun shining bright today, I managed to get some decent photos of the new earrings.  Here they are individually:

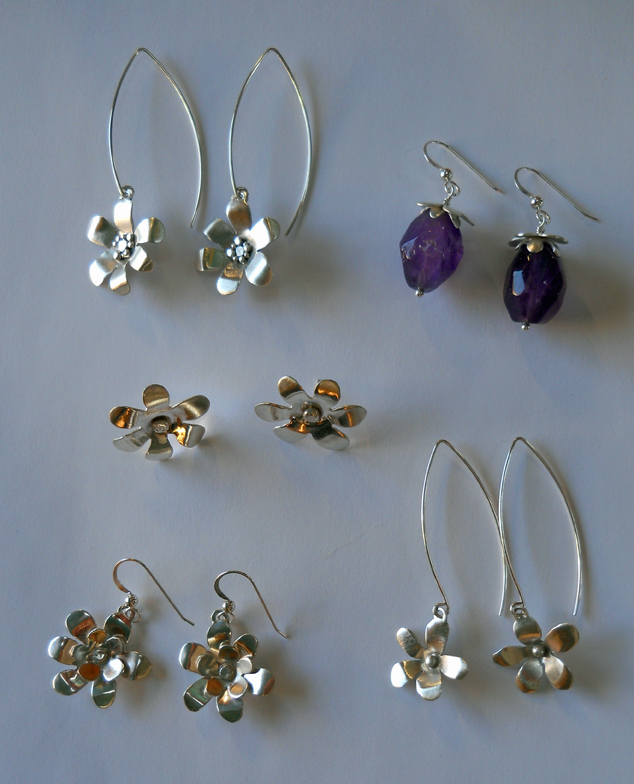
These are 2 flowers, large and small, that I've soldered together with a hammered ball center.  I've suspended them on a standard earwire.
These flowers are domed so the middles are pushed in and the petals are curving outward and back.  These also have a hammered silver ball center.

These flower dangles are shaped with curving petals and lots of silver balls soldered in the centers.  I love the long earwires.
These flower dangles are smaller, with only 5 petals that are also curved and have one rounded silver ball soldered in the center.  Again it's the long earwires that make the look.


Large tumbled, faceted amethysts are capped with the flower caps.  They are made of 2 different sizes of flowers that were dapped and soldered together and drilled through the center.  I inserted a headpin through the bead and cap and twisted it into a loop at the top and suspended from silver earwires. 

That's all for this weekend.  New things are still brewing and hopefully I'll have time in the next few evenings to finish a few more things.  Can you believe there's only 1 more day until December!  How am I going to finish all the things I want to do?!

Sunday, November 28, 2010

Sunday Thanks

After celebrating a great Thanksgiving that was full of quality family time and yummy food, I managed to get back in the studio today.  Initially it was difficult to stay inside as the sun was beaming and the sky was bluer than blue, BUT it was 18 degrees outside and that was enough to keep me inside and get started. 

I visited the Center for Maine Craft in Gardiner last week and was pleasantly surprised that a couple pairs of earrings had sold leaving my flower series with only 1 sole little pair of flower studs.  This gave me my direction for today--to design some new flower earrings.  Here are the beginnings of 4 new pairs:


They are all 24g sterling silver that I cut and dapped and embellished with silver round and hammered balls.  The top two pairs are slated for long dangling earwires.  The bottom pair will be studs and the smaller double flowers will cap a bead.  I started wearing a pair of earrings a few months ago and have fallen in love with them and can't give them up, so I fashioned some of these to be similar. 

A nice walk this afternoon broke up my work time and gave me the energy to finish up.  If only the sun stayed up so I could photograph them.  Check back in the morning for photos of the finished earrings. 

Thursday, November 25, 2010

Finding Inspiration

I'm back from a couple road trips and really wanted to jump back into the studio, but found I was a little less than inspired.  So I pushed anyway and worked on these earrings that I knew would be great for inventory and also just get me working.  I reticulated the 4 circles at once and then worked on the 1 1/2 inch pair first. 


I cut and bent 20g sterling wire and set in a design on the reticulated surfaces.  I added a few balls and then soldered the  pieces together.

The second pair is made of 1 inch reticulated circles with sterling balls arranged in a simple design that have been soldered.  The look is fresh and they are easy to wear.


More new things coming soon.

Monday, November 8, 2010

November Grays

There's something about November in Maine that makes you wish you lived somewhere else.  It has been gray and cold and rainy since the calendar flipped and now that we've turned our clocks back and it will be dark by 4pm.  Motivation runs thin, as the chores to prepare for winter stack up.  But, there are happy glimmers about upcoming holidays and events that will wash away the grays in twinkling white.

Well, I guess that's all of my November complaining--back to creating.  I'm still stuck on cuff bracelets and thought I'd vary the theme a little.  I've reticulated silver discs and joined them together to form the body of the cuff.  I then shape the body around the mandrel and embellish the seams with silver balls. 

I've been playing around with a large, beautiful amethyst cabochon and think I'll probably set it in this cuff.  Here's how it looks from the front after soldering a fine silver bezel and more silver balls.  I've cut out the back for the light to shine through the stone.  This is it from the side. 

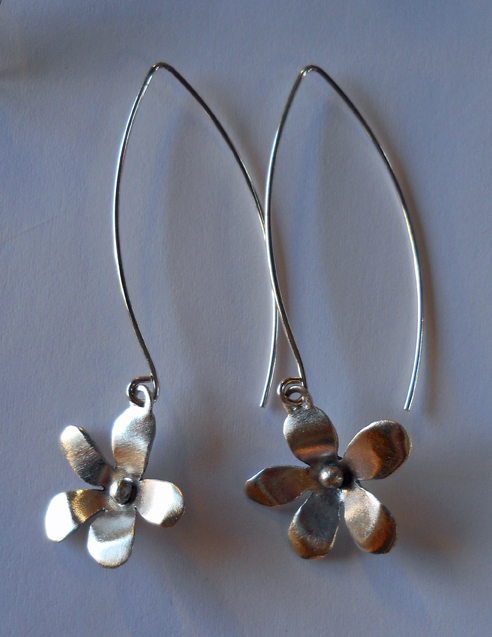
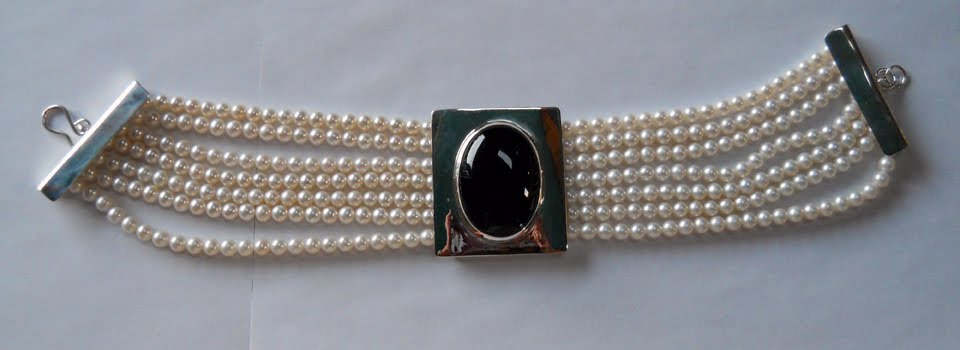
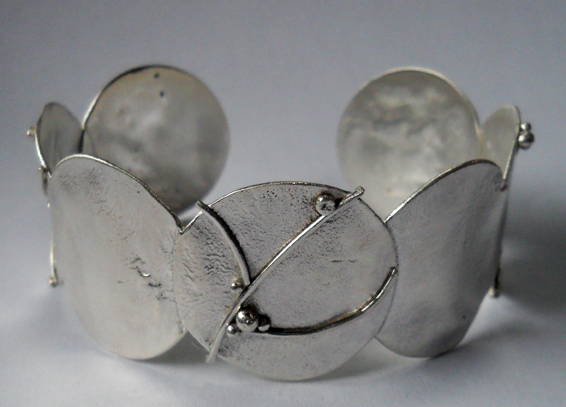
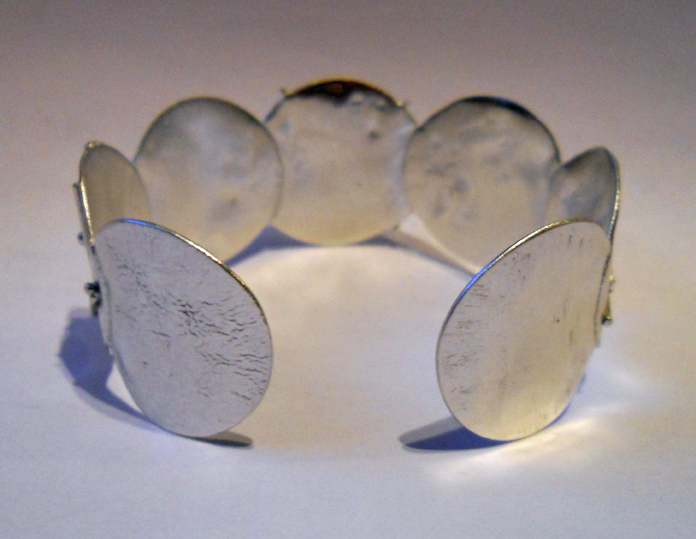
The center disc is 2 inches, which is followed by a 1 3/4 inch disc and ends with a 1 inch disc.  The stone is 18 x 25mm oval.  Here's how the piece looks finished:


I started this other cuff and I'm not sure if it's finished or not.  It's 7 one-inch circles that are reticulated and fused together.  I formed the cuff shape and then embellished the second, center, and sixth discs with bars and balls. 


I like the repeating shape around the wrist, as well as the simplicity of the design.  I'll continue looking at it and decide if any changes will made. 


More rain and gray today and we had (and survived) our first power outage--November, it's a real challenge!

Sunday, October 31, 2010

Back at It

I made it back in the studio this weekend and it felt good!  After receiving my metal order a week and a half ago, I decided it was time to clean the studio--I couldn't see the top of any of my benches.  So after being a lump without motivation, I jumped back in with both feet and created these new cuff bracelets.  Yesterday was a little rough, but today really pulled things together. 

Here's the first cuff shown in 2 varied positions.  It is reticulated silver with a sunburst variation soldered on.  Silver balls were added for dimension to the overlap.  I like the movement the lines create around the wrist.


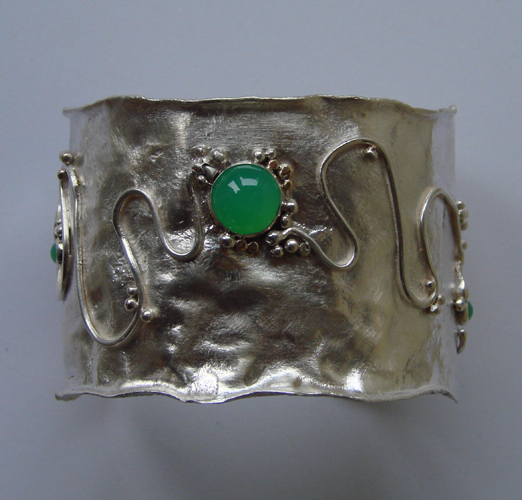
Notice the little oval in the back of the cuff--that's where I put my hallmark and sterling stamp.  I've found that sometimes the metal is so heavily textured you can't see the stampings, so this way it adds a design element and solves the reading inability. 
The second cuff is similar to others--it has the split front overlap, but here I added some silver balls and one 4mm fine silver bezel cup to the overlap.  It was difficult to decide what color stone to use, but ultimately I went with a red garnet.  It's translucency shows off the lovely red color, while maintaining a simple, uncluttered look. 


I have another exciting piece in process, but decided it was time to stop for the night.  I'll keep working on it this week and hope to announce it soon.  Happy Halloween!

Wednesday, October 20, 2010

Waiting

I am expecting a large metal order today--YEAH!!!  I can't believe I let my stash get so low.  I knew I was using alot and trying to use the scrap as well, but this weekend my creativity was completely stifled because of the lack of materials.  NEVER AGAIN will I let it get so low!  Looking forward to seeing the shiny new coils and sheets--but not looking forward to the cost--can you believe silver is over $23?!  and don't even get me started with gold prices!  Oh well, new ideas are swimming around in my mind.  Looking forward to time in the studio this weekend. 

Tuesday, October 12, 2010

Similar But Different

Here it is--the latest cuff bracelet! 


What do you think?!  The big difference with this piece is the metal--I used pre-reticulated silver which is more highly textured than what I've been creating; and while I like it, I do feel it is busier looking and I didn't want to embellish it as much.  So, I decided to keep it simple.  I used some large silver balls that I lightly hammered and soldered them along the seam line.  I then added 5 tall pieces of silver that I mounted bezel settings on.  I set four 3mm rhodolite garnets and one 3mm amethyst.   Here is another view--note the height of the stones, as well as the varying height of the balls.


To achieve the final finish, I brushed the bracelet with several different wire brushes, which allows the metal to shimmer and shine. 

And that's all for now.   

Sunday, October 10, 2010

Can't Keep Up

It's been a great year for big cuff bracelets and I'm having a hard time keeping them in inventory.  I finished this piece last weekend and delivered it to the Center for Maine Craft. 


It's reticulated silver with silver wire squiggles and silver and gold balls.  There are three chrysoprase cabochons.  The large chrysoprase is 10mm and the other two are 4mm each.  Here's a side view showing the smaller stone:


Yesterday, I finished this cuff and today I delivered it to Barbara at CRAFT in Rockland.  She's had great success with my cuffs as well.  This piece is all silver with a couple gold touches.  I reticulated the two pieces of silver and then fused them together forming this kind of double wave overlap.  I then added the silver balls along the two seams and kept adding until I was pleased with the design.  It's along the same line as this cuff and I really like where this sereis is going. 


I have one more cuff in process and I'm hoping that tomorrow I'll be able to complete it.  It's reticulated and has similar features, but definitely different.  You'll just have to wait and see!


Sunday, October 3, 2010

A Successful Finish

Here it is--Betty's ring!  What an exciting project to create from start to finish.  I started with an antique, unwearable ring with a fantastic stone and worked with my client (Betty) to create a new ring that she would wear, but also keep the memory and beauty of the old ring alive.  And here is how we began--with a sketch:


The ring is made up of sterling silver and 18k gold, along with the original 10.5mm amethyst gemstone and gold ring shank.  It doesn't look like much, but as we based this ring design on other rings I have made, we could work in the parts that we liked and knew would enhance the features of the gemstone. 


I made all the pieces for the ring and had one final meeting with Betty to show her before I put it all together.  Notice the original ring side pieces--they are gold and fluted.  The new ring shank is crazy 8 profile in sterling silver, which is a very comfortable shape for a shank.  The bezel is 18k on a sterling face.  And...


...later that week, the ring gods were with me.  I put the pieces together and finished the ring off without a hitch.  One final sizing on Friday, delivery day, and it is going back home to Florida for the winter to be shown off.  Here's a bunch of different views to give you the full affect:


Here are some pics with the ring next to the original drawing.  I actually could see the three-dimesion in my mind while looking at the drawing.  There's a little difference, but overall an accurate project from start to finish.


Betty, thank you sooooo much for giving me this opportunity--allowing me to create a special ring for you.  Enjoy wearing it and I look forward to seeing you next year.

Monday, September 20, 2010

Prelude to Betty

Betty's ring that is.  I have my next commission ready to go and thought for good measure, I should do a "test" ring.  So that's exactly what I did.  I chose a lovely faceted rhodolite garnet and worked in sterling and gold to get reaquainted with the process and here is the end result:


I used 22k yellow gold for the bezel and hammer set the 8 x 10mm garnet.  The balls around the bezel are 24k yellow gold and just glow against the brushed sterling silver. 

I'm geared up and ready to go with the commission.  Look for pictures soon!

Monday, September 6, 2010

Commission Follow-Up

Labor Day weekend has come and gone and despite the beautiful weather calling my name, I managed to get some work done in the studio.  Continuing with my commission talk from the other day, one should always remember that the original design might work better in a drawing than in real life, so always remain open to adjustments and modifications.  For instance, today I remade a clasp for the seven-strand pearl choker because the original one that I drew and even fabricated, didn't allow the wearer to experience the best fit.  I'm pleased with this change and it minimally changes the overall design.

I'll go through the steps for this new choker from drawing through execution:

You can see the basic design and sizes listed, as well as the original clasp design.  Next up are the actaul fabricated silver components:


This is the frontispiece where a 40 x 30mm black onyx cabochon will be bezel set in fine silver.  The bars show the loops that the pearl strands will be connected to after being strung.  The same loops are on the backside of the frontispiece too. 


I'm using 5.5-6.0mm freshwater, nearly round white pearls.  They will be strung on silk and joined to the clasp and frontispiece with silver bead tips. 

The completed necklace: 


It's ready to be tried on for size and overall fit.  Note the clasp design change from the drawing.  I found using a classic bar end with a loop and hook clasp allows the necklace to be drawn in tighter or slightly loosened by easily changing the loop.  Details are below:


I'm still contemplating adding a spacer bar to hold the pearl strands together; however, when I tried on the necklace, they laid nicely in order, so I'll wait on that until I show it to the client.  I feel so lucky to be able to create such a striking, yet classic necklace and luckier that I have the perfect client to wear it!